Cleanfeed makes it easy to insert a radio jingle into a live show; play your podcast intro; include a pre-recorded segment; or loop a music bed. In this guide we’ll show you how.
Clips you play will be heard by you, all of the guests in the session, and be included in recordings too.
This guide explains how to get started, and then goes on to the specific types of audio (beds, sound effects and idents) that you might want to include.
This article focuses on the clips area, however there may be times when your show is centred around a piece of audio, such as a pre-recorded interview. For an alternative tool focused on a single piece of audio, press Player from the navigation menu.
The first stage of playing a clip is ensuring it’s ready for showtime. In the radio business, this is known as topping and tailing which means removing any silence at the beginning and end of your audio file. Once your audio has been prepared, save the files to a local folder or directory of your choice.
For the best possible playback quality, we recommend editing and saving in WAV format, or FLAC format if you can.
Now we’ll add your prepared audio clips into the Cleanfeed session.
The clips you have selected will be loaded on-screen, shown with its filename.
You can select more than one clip, but to keep clips manageable it’s best not to load too many into the session at once.
If you can keep your clips organised in folders on your computer, it’s easy to load a whole folder at once.
Press the clip to play it back. You and your guests will hear the audio, and you’ll see it in the meter.
If you make a mistake, just press the clip again to stop it.
The clips area starts in Play/Stop mode. This means that the first press will play and the second press will stop.
For sound effects, you often want to play again and again, and let them overlap even if the last one didn’t finish. For example, you might have a clip of audience applause, or a gameshow sound when someone scores a point.
For sound effects, select the gear icon to open the settings and choose the Play/Play setting.
In this mode you can’t click again to stop the clip. Instead, use the Stop button if you really make a mistake and need to get back to silence.
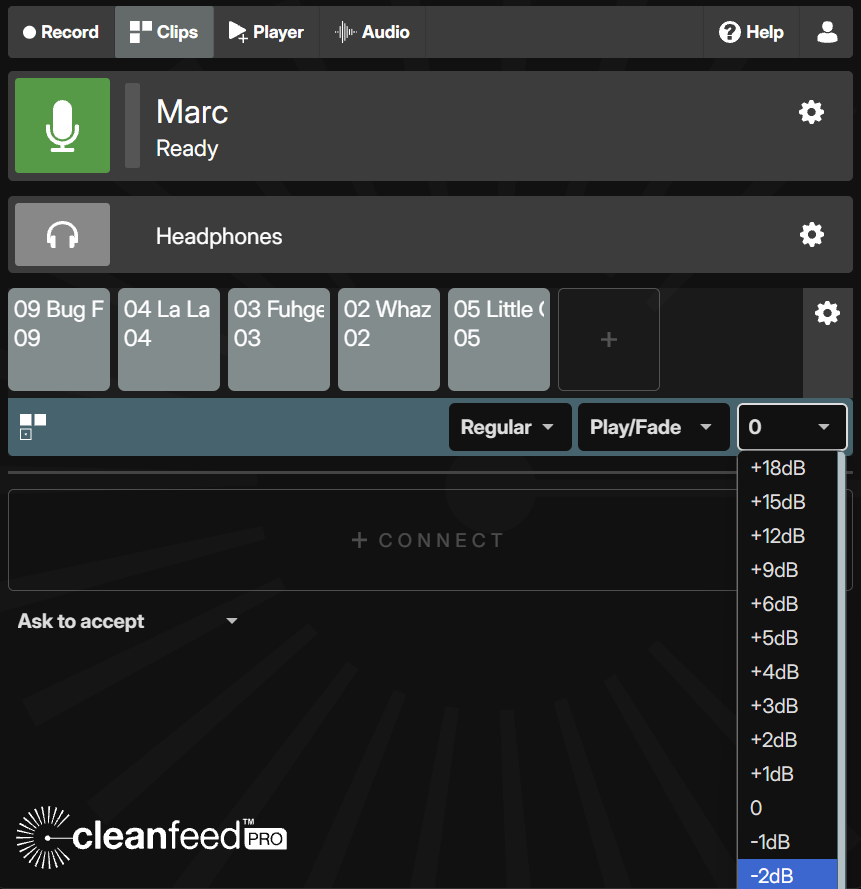
To ensure you don’t overload the volume when triggering multiple clips, lower the volume a little, for example by selecting -6dB from the volume menu.
If you like to present with backing music,you’ll probably want your music beds to loop, so you don’t let the music end.
The different modes of the clips area allows you to change the playback behaviour. In this case, select Loop/Fade. This mode will ensure any clip loops continuously, until it’s pressed again to fade out.
To fade between beds, press the current playing clip to fade it out, before pressing on a new clip. This will sound natural and ensure a smooth transition.
For the smoothest sound, consider setting the volume of your beds in advance, in your audio editor.
Suppose you have some show specific identifiers, you may find it useful to fade between them, if some of them have music at the end, for example.
For this, we’ll put the clips area mode to Play/Fade mode.
In some cases you may like to use music beds and sound effects at the same time, and you can do this using multiple clip areas. Cleanfeed allows you to have up to three clip areas, each with their own mode.
To get things setup:
Now you can set up each clips area accordingly, depending on the type of clips you want to play.
Lower the volume of your music beds clip area, so your sound effect clips don't overpower the overall playback feel.

Remove clips by pressing and dragging them away to the background of the main Cleanfeed studio screen, beneath the host and guest rows. You can also shuffle and reorganise your clips, just by pressing and dragging them horizontally.
Sometimes you’ll get an audio clip from a third party source, which is too loud or too quiet. Just like all of the rows in Cleanfeed, there’s a level control on the right side of the Clips row, which defaults to zero adjustment.
Looking for bigger clip buttons? The clips player is designed to be great when used with a touch screen, and you can change the style of your clips area to suit your needs. Press the gear icon on the wall you'd like to make the adjustment on, and then change it from Regular to Wide or Jumbo
Your clips are heard by everyone in the session, so get creative! You can use beds and background music for a professional sounding recording.