The RØDECaster Pro has become a popular device for podcasters. In this article we’ll show you how to connect it to your PC or Mac with the correct settings, make a high quality call with Cleanfeed, and go through some best practices that are specific to this device.
Guidance in this article relies that you are running firmware version 2.1.2. To check your firmware version go to: Settings, Advanced, Information.
If you don't have the latest, follow the RØDE guide to upgrading firmware.
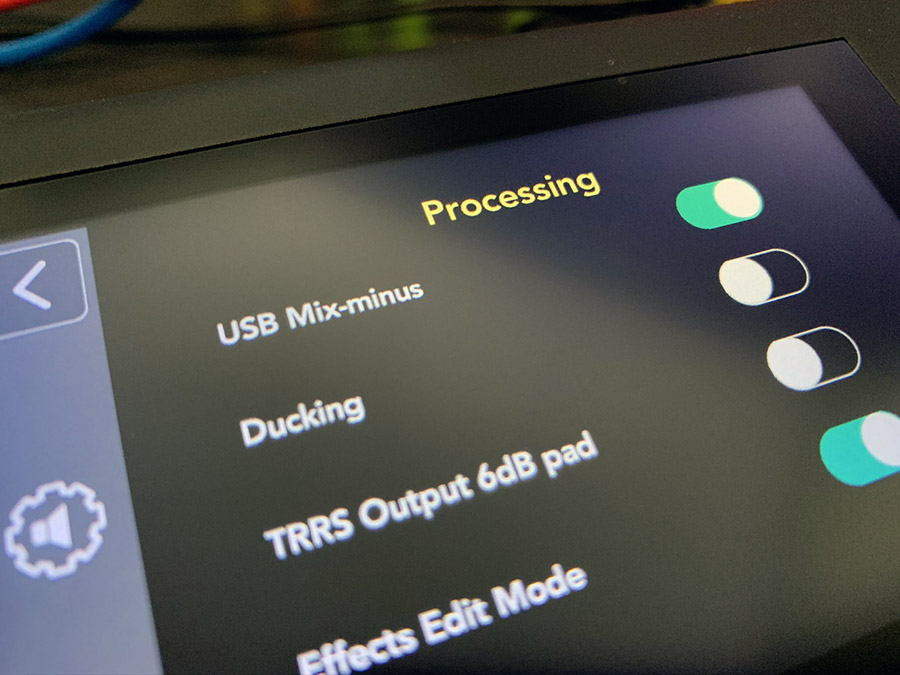
There is a specific setting in order to ensure that the RØDECaster Pro is set up in a way where you can send/receive audio without any adverse effects, such as echoing. It’s known as USB Mix-minus.
USB Mix-minus option will ensure that any audio sent to your RØDECaster Pro unit isn’t then sent back again to Cleanfeed. If this setting was off, then the result would be the guest audio returning to themselves, which would be disruptive.
Use the menu to select: Settings, Advanced, Audio, Processing. Then, ensure USB Mix-minus is on.
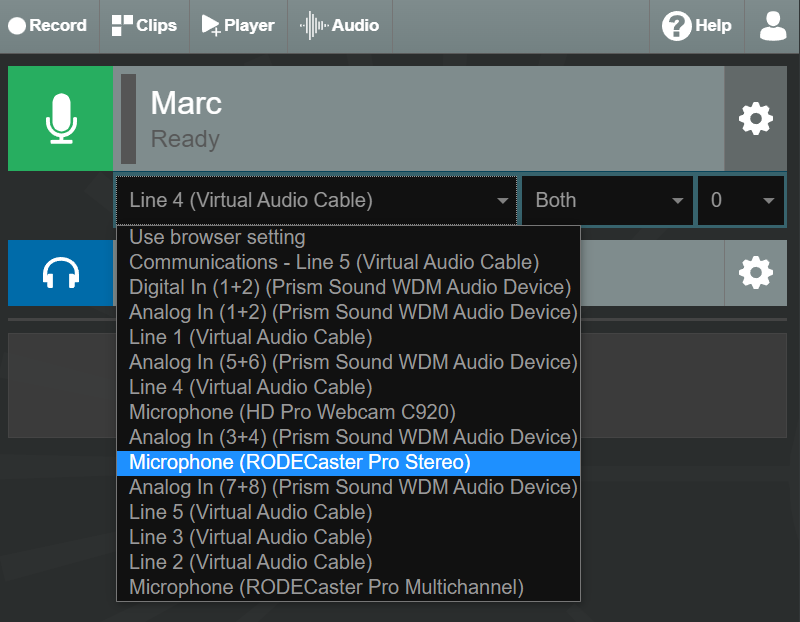
Once mix-minus has been setup, configure the audio devices in Cleanfeed to use the correct RØDECaster Pro stereo input and output devices.
Set your input device by using the gear icon next to your name. The correct device required is RODECASTER Pro Stereo
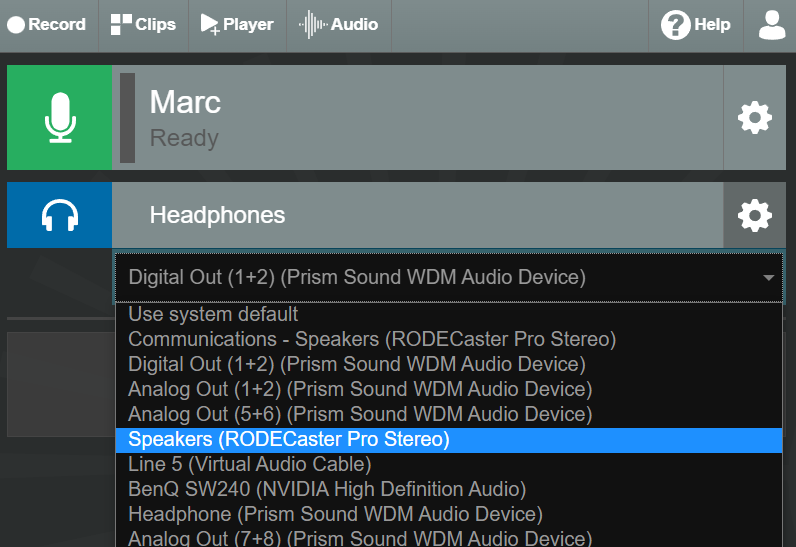
Select the correct output device to RODECASTER Pro Stereo so you can hear your remote guests on Cleanfeed. Change your system output device, or if you have Cleanfeed Pro, you can pick an output device by pressing the gear icon next to Headphones.
Now that you have your hardware setup with Cleanfeed, it’s time to connect to your guest. Do this in the regular way on Cleanfeed; if you are making your first connection why not look at making your first session
Once your remote guests are connected, you should now hear them on your RØDECaster Pro by bringing up the USB fader. Your guests will be able to interact with all the other participants.
Finally, it’s time to record. Press the big REC button on the RØDECaster Pro.
Why not create your primary recording with the RØDECaster Pro and then a backup recording with Cleanfeed. Or, combine both Cleanfeed and the hardware in multitrack mode to obtain a track for every participant in the session.
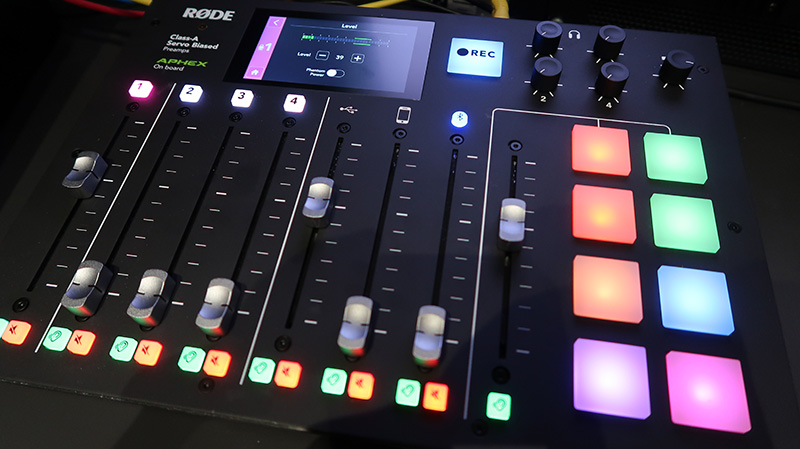
Much like setting your microphone level in Cleanfeed, the same will be true setting the audio levels on the hardware. This will give you the best results when using the RØDECaster Pro on its own to record, but also when joining with remote guests using Cleanfeed.
The hardware has a natural fader position in the centre, and this is recommended. It means that when setting up your microphone levels using the dials, you can make sure they’re presenting themselves at an adequate level so you don’t have to use the fader to boost the level above the central position. It will also ensure that the level you get from your guest on Cleanfeed will match the volume of your microphones, and that means less work in post-production later.
To ensure the best audio quality for Cleanfeed, make sure your guests level in Cleanfeed is hitting the orange area on the meter; and that if your RØDECaster Pro is selected as your system device, that your audio is at 100%.
The RØDECaster Pro works smoothly with Cleanfeed. We’ll keep this updated with more setup tips and best practices; let us know your own!