You might find it useful to make recordings of each guest in a separate application such as an audio editor or DAW. This can be useful if you work in a way where recording multiple takes is part of the job. For example, ADR, loop groups, remote crowd ADR and other uses in commercial audio production. This guide will show you how to send audio in real-time into another application, using a virtual audio device on Windows.
Routing audio to another app requires Auxiliary Outputs and this won’t work in standard Cleanfeed, so you’ll need to upgrade to Cleanfeed Pro to use it.
This guide assumes you already have some basic knowledge of Cleanfeed, and audio routing in general. It is intended to give you an understanding of how to route audio from Cleanfeed to another application. In this example we’ll be using a virtual audio device and Adobe Audition, on Windows 10.
It is also possible to achieve similar results by patching physical cables between multiple sound card devices, or by using an Audio over IP system such as Dante or Livewire+.
To avoid using physical patch cables between two sound cards, we turn toward a virtual audio device on Windows to achieve everything we need, inside the box. There are two prerequisites which you’ll need to go ahead and install:
You will need to create multiple virtual devices, depending on how many guests you need to route from Cleanfeed to your audio editor. It makes sense to create a handful of virtual cables to begin with, so you have enough.
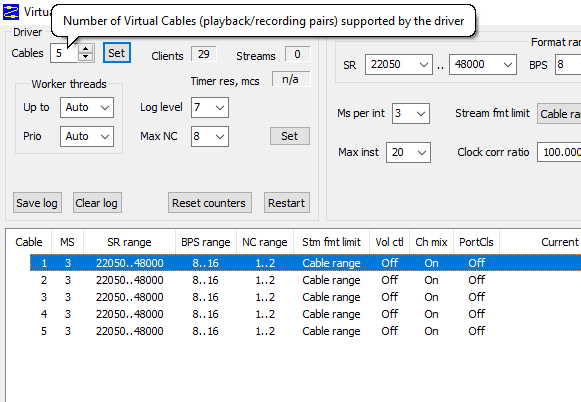
To begin, open the Virtual Audio Cable Control Panel as Administrator
With the Control Panel open, under Driver parameters set the number of Cables to 5, for example. Press Set to apply the settings.
With all the necessary audio cables set up, you can now open your audio editor. We’re using Adobe Audition in this example, but the setup will be similar with other audio editors that support multitrack recording and ASIO devices.

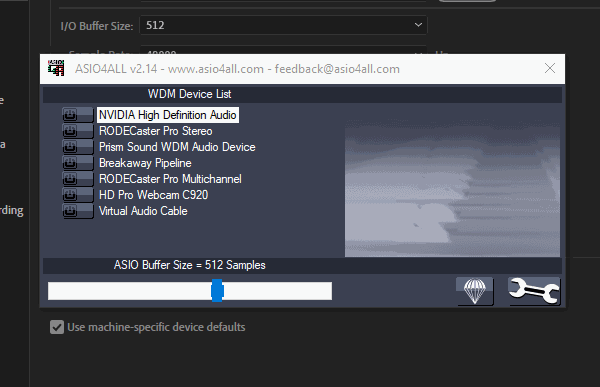
Ensure you’ve only selected the In: devices When selecting the Virtual Audio Cable devices in the ASIO4ALL manager to avoid any issues in the steps ahead.
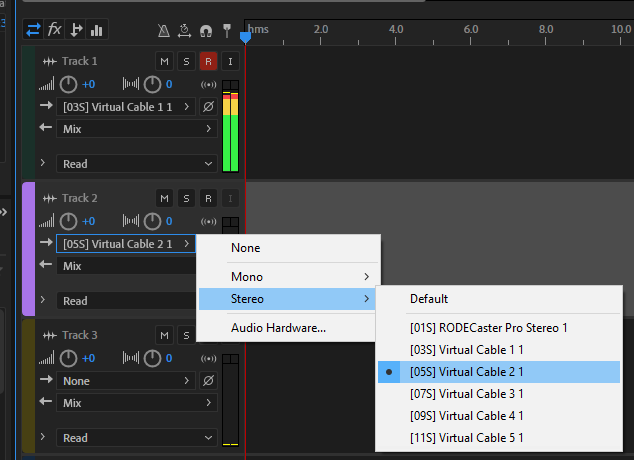
It is now time to start a new Multitrack session in Adobe Audition.
Assign the respective stereo input device on each track you have created.
The last step is to get Cleanfeed setup in order to send audio from each guest in your studio.
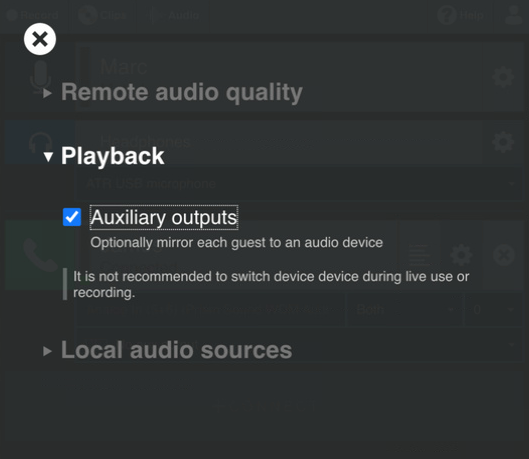
From the Audio menu, under Playback, tick the checkbox next to Auxiliary outputs.
Now, have your guest join the session in the usual way. Press their gear icon to reveal the new audio routing options.
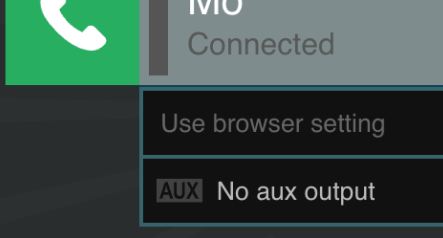
These audio routing options are specific to guests. They don’t apply to your local audio. Follow our guide if you’re not familiar with how to connect with a guest.
Select your chosen virtual device from the Aux drop-down menu. The guest’s audio will be mirrored to this device.
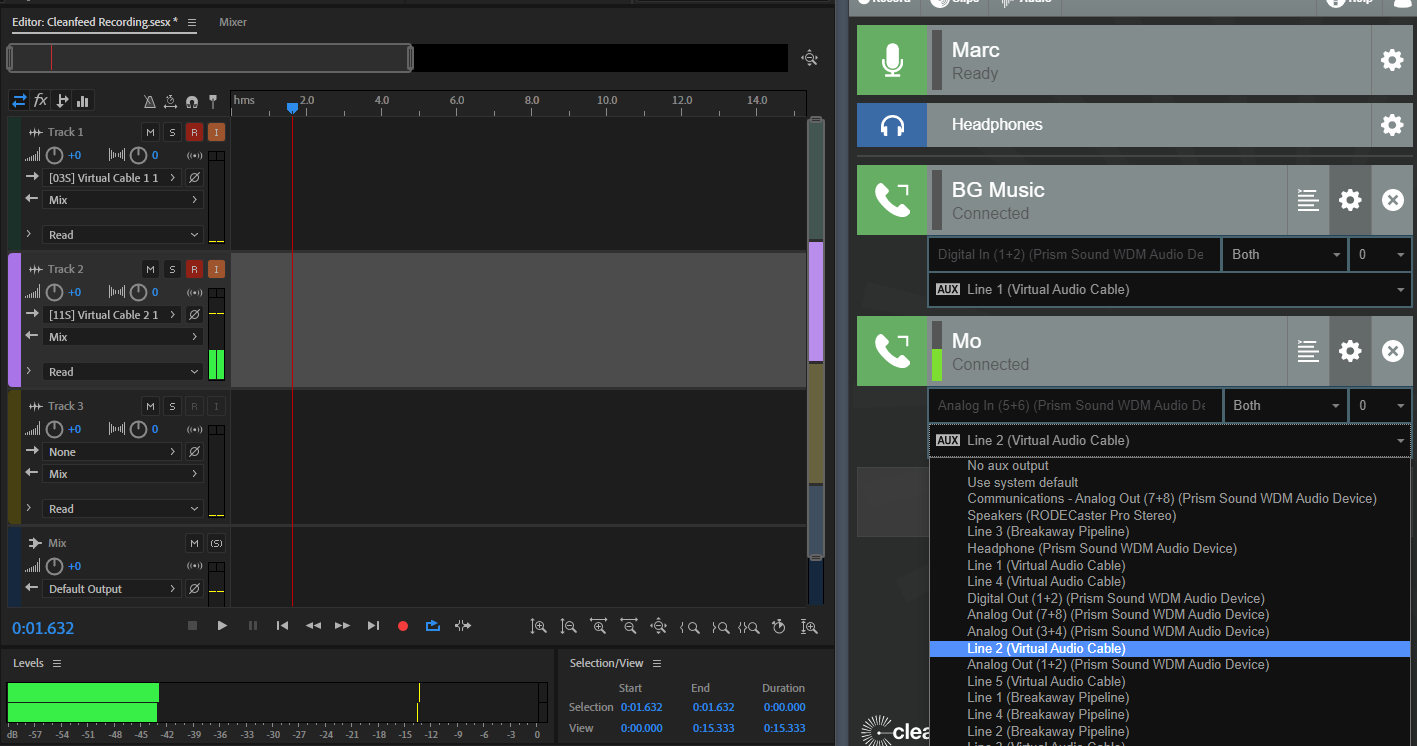
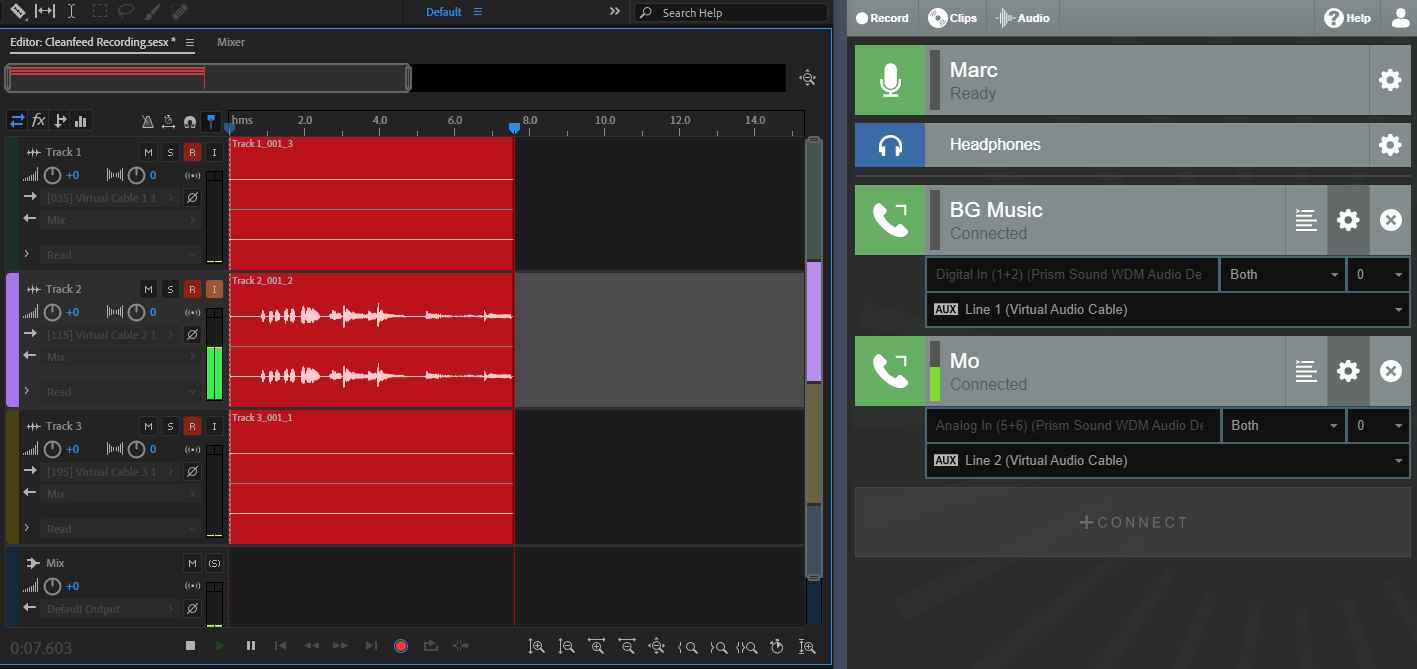
Once you have assigned a device for each guest in your studio that corresponds with a track in your audio editor, it’s time to get recording.
We’ve showed you how to get your audio for each guest out of Cleanfeed and into another recording application on Windows. We also have equivalent guide for for macOS.