Have you ever tried to un-bake a cake? Editing a recording where everyone is mixed together can be almost as hard. With Cleanfeed, recording separate tracks for each guest is easy and fast.
We call this multitrack, and this quick guide steps you through the process, some best practices, too.
Before we get started, you should be familiar with the basic process of inviting guests and recording them. If not, step over to our introductory guide first.
These steps are easy to follow, so we strongly recommend doing a test first! Don’t wait until you have your first serious guest; record something with a friend or colleague so that you’re familiar with the process and also in tune with some of our best practices, below.
If you’re a quick starter, here’s a summary of multitrack recording in Cleanfeed, and what we’ll cover here:
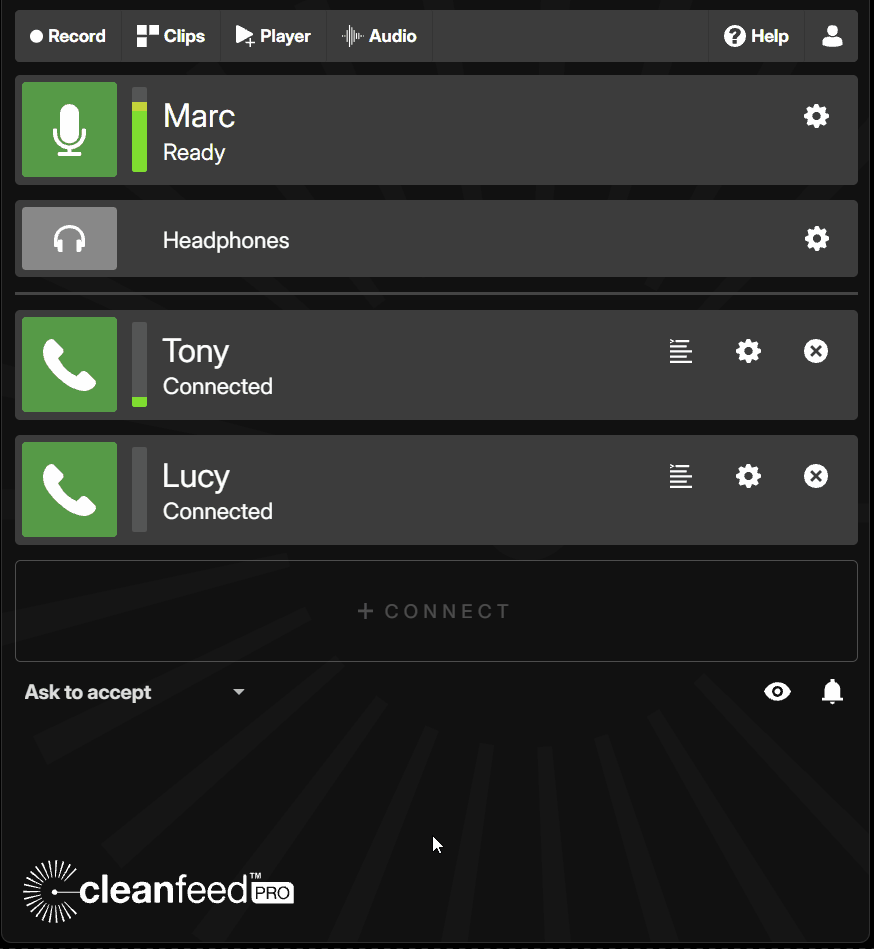
With your guests connected to your session, select Record from the top of the main screen.
It’s here that you can give your recording a useful name and, importantly, set up what type of recording you need.
Select Multitrack from the options.
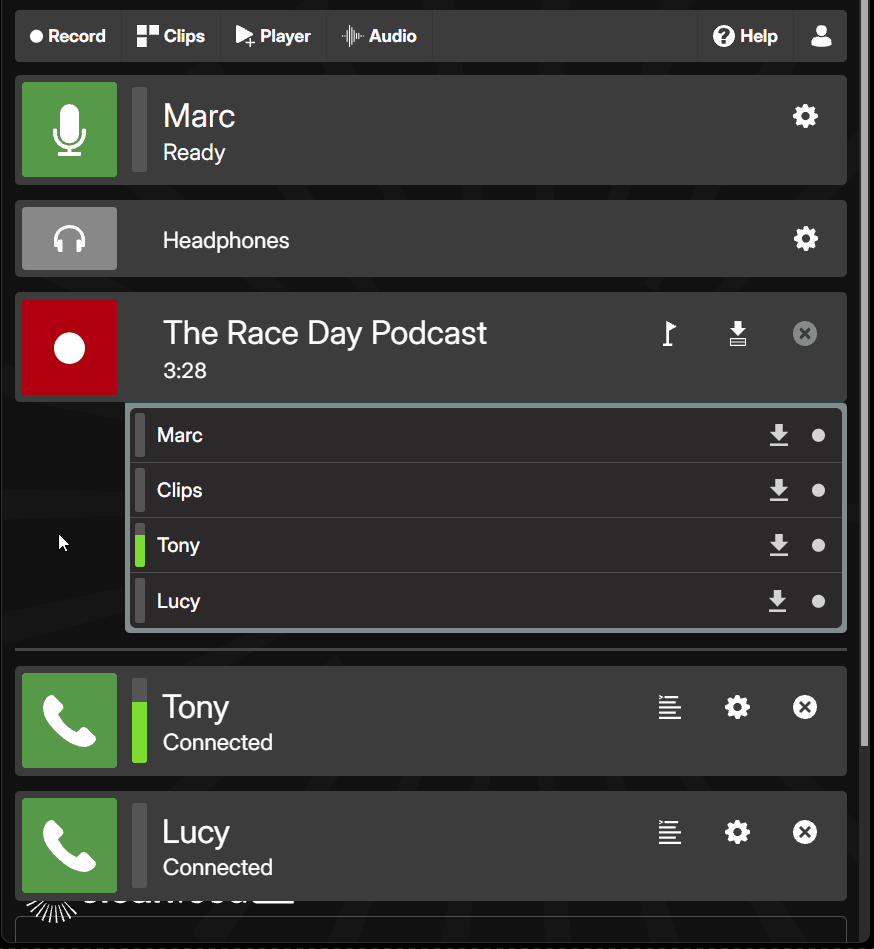
Now, with everything ready, press Record. You’ll be returned to the main screen, and can see your recording in the session, with the clock counting.
Your selection from the menu is remembered from last time, so even if you normally use Multitrack it’s worth checking just in case.
Go ahead and record your programme or interview. When you’ve completed, it’s time to save the file.
Before we save, we’re going to pause the recording; it’s helpful that we’re not adding extra audio. Select the recording name in the main screen. The red indicator will disappear, and the word Paused appears and the clock pauses.
Now, press the save icon (it’s an arrow pointing down into a box) which is to the right of the name of the recording. The browser immediately starts saving the file.
Normally, the Chrome browser saves to your nominated Downloads folder automatically. But yours might be set up to ask every time you save a file. You can change this in the browser’s own settings.
When the save has completed, open the file. The easiest way is to select the newly saved file within the browser. It’s a Zip file, and most systems (such as Microsoft Windows in our illustration) will open the file like a folder and show you the contents.
Open the files in your audio editor, such as Audacity. Double-clicking may be enough, otherwise you could consider dragging them into the app.
Cleanfeed’s system design ensures the audio in the files aligns perfectly during the session, even for long recordings.
If you have a guest arrive during a recording, the audio will be correctly synchronised but their file begins at the moment they arrive. Align the end point of this track with all the others.
And that’s our multitrack recording. Now, with the basics in place, let’s look at some best practices and advanced usage.
For peace of mind, you can save at any time, even while the recording continues.
In fact, we recommend you do this at the start of your session, as it’s a great time to check everything is in place.
When your guests have joined the session, start recording as shown in the steps above and speak with them for a short time. Now is a good opportunity to explain the process of being on your podcast or programme, and get them comfortable. For us, it provides audio for a short test.
This time, don’t press to pause the recording and instead press the save icon without pausing. The recording continues but files arrive on disk as normal. Open the files in your audio editor, press play and ensure that in each file only one guest can be heard, clearly, and that the files are free of glitches or unexpected outcomes.
All the while you are doing this, recording continues in the background. If you’re happy, return to the session and start your programme or interview in earnest.
You might have already noticed an extra track which isn't one of your guests: Clips. This is where any audio from the clips player is recorded. But not everyone is using clips, and these extra files can be unnecessary and take up disk space in your workflow.
The same applies if you’re recording audio drama or are the producer of a show. It’s common to have guests in the session who are listening, but not participating in the recording, such as download the director or producer.
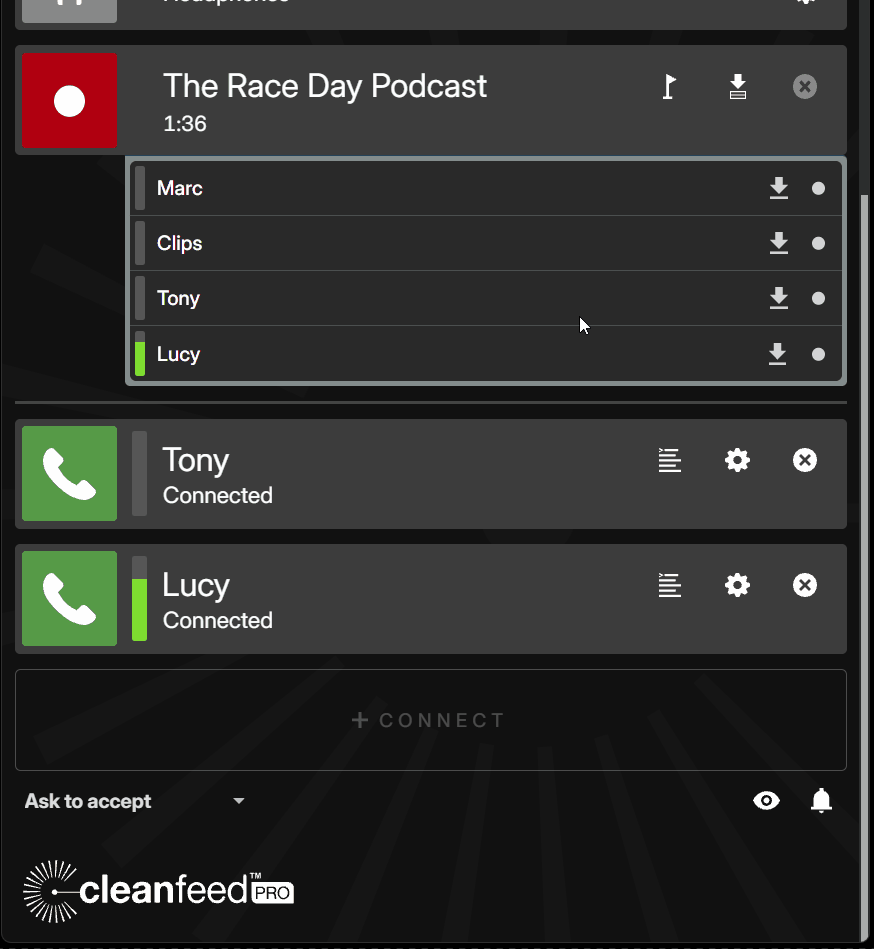
You can switch off anyone from the recording, by pressing the dot icon next to the track name. It means no audio will be recorded; you’ll save disk space and when you save a Zip file there won’t be extra tracks for these files.
If you make a mistake, just press the dot icon again to switch the track on again. But don’t forget that when a track is switched off, no audio is recorded. Switching it on again later will leave silence for the period it was switched off.
Get familiar with Cleanfeed’s audio meters. They’re a definitive indication of what is being recorded.
For long interviews, you’ll want that peace of mind again. And nothing gives more peace of mind than seeing a file on the disk of your own computer.
Cleanfeed makes saving during the recording easy. Just like above when we did a short test; no need to pause the recording, just press the save icon at any time.
A good opportunity is when there’s a natural pause in conversation, or between sections of a show. Some of our community like to save every 20-30 minutes.
With Cleanfeed, your audio is end-to-end encrypted over the internet. We can’t listen to it, or save a copy on our servers. Thankfully, crashes are rare but if there’s a problem with your computer then having a file on disk is a great safety net for most issues.
With a separate track for each guest, disk space requirements increase substantially compared to a normal recording. It’s no fun to run out of disk space half way through your work. Before you start, make sure you have enough disk space on all drives on your computer.
We recommend having at least 10 gigabytes of free space just to begin with, as it means you can focus on your recording and not on these concerns. But for long recordings, or tighter requirements, here are the space requirements with the session set to Voice optimised:
Note that this is the space requirement for scratch space and the final recording, so if you’re saving periodically and generating a new file on disk each time, you’ll need space for these, too.
For Music optimised, which is stereo, you’ll need to double the gigabyte requirement.